
Events
This section introduces the Events page where the users can check the event status of ProSync.
The users can check the event status of ProSync events that occurred on a per-diagram basis.
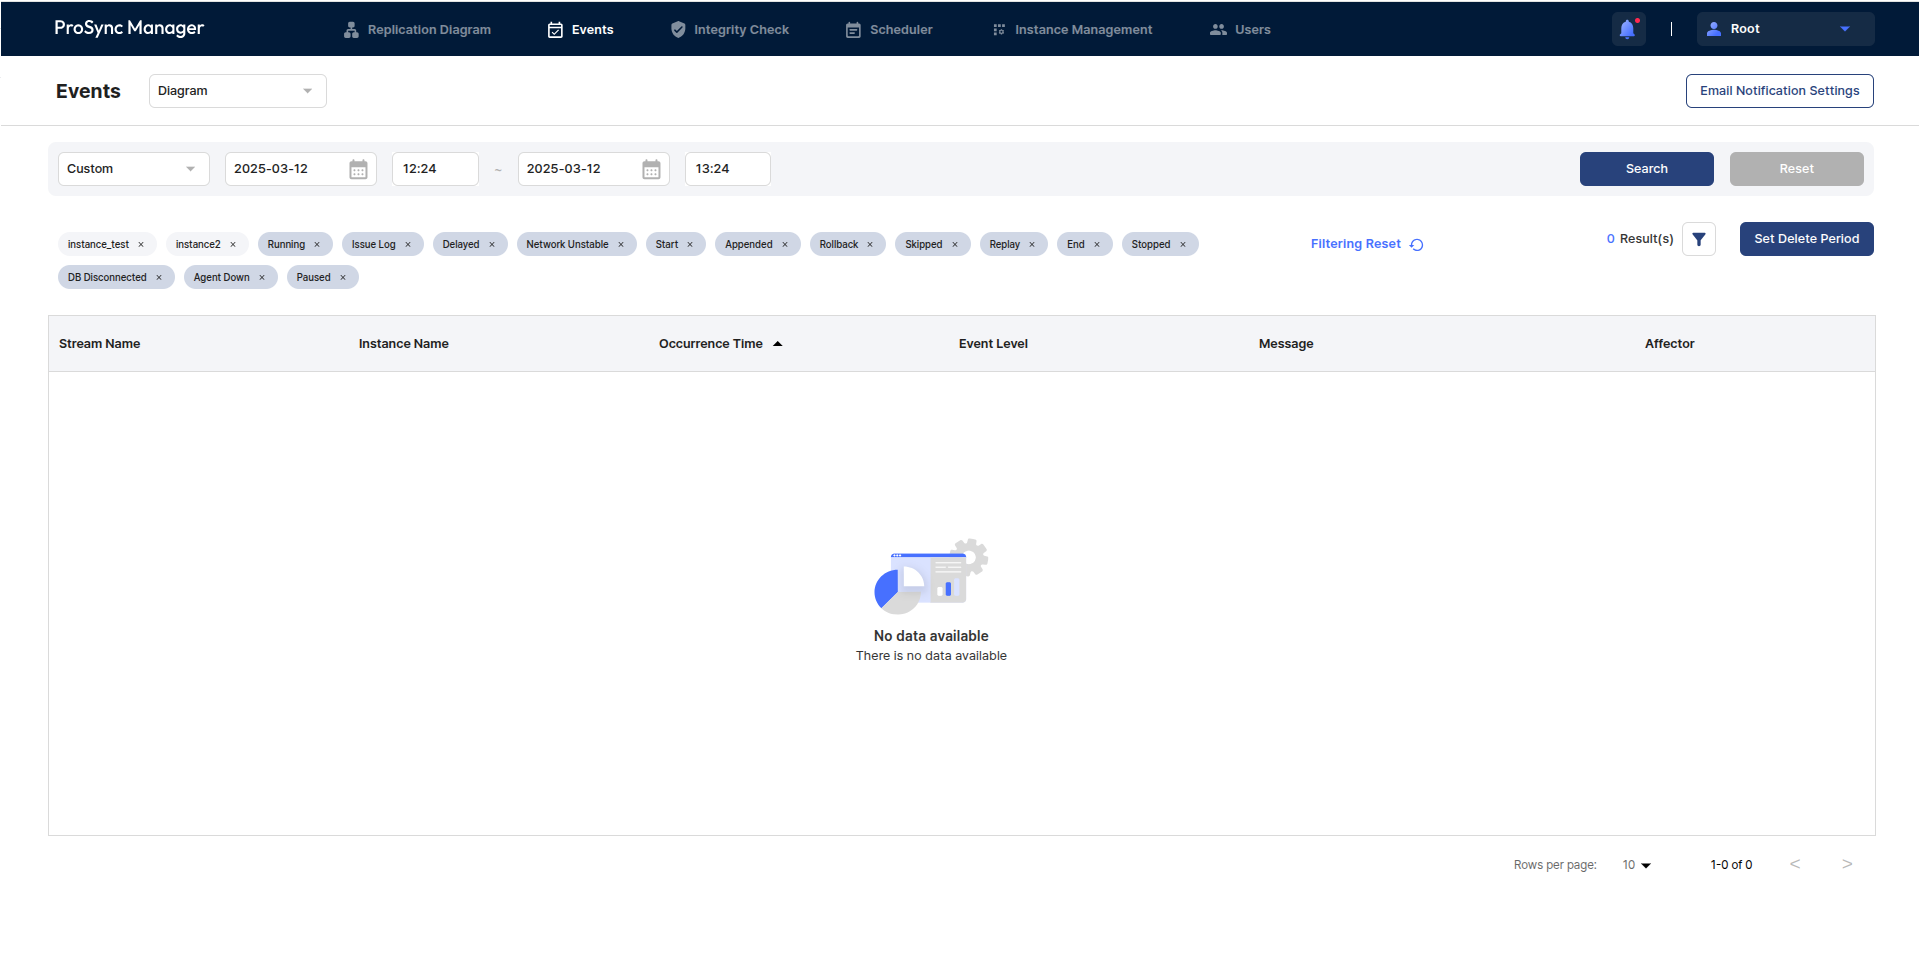
Events area
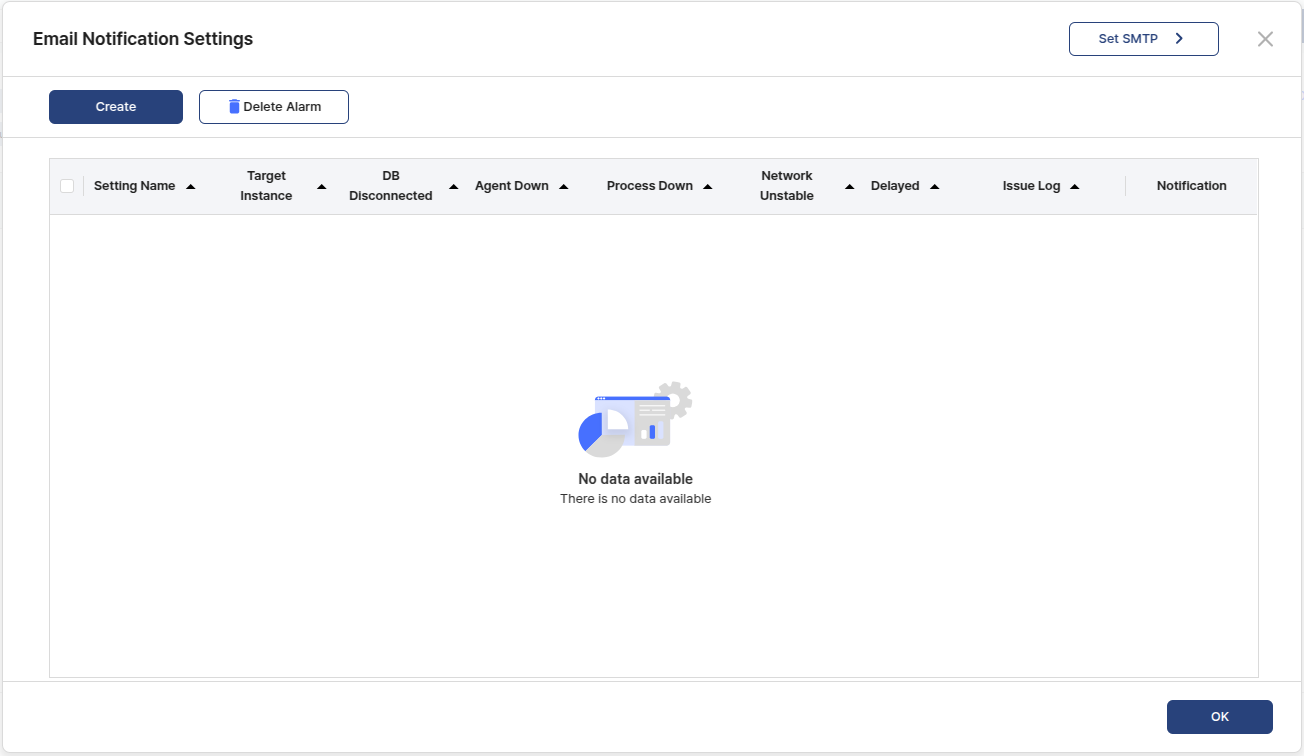
Setting Email Notification
The users can set up email alerts for events that occur.
Event notifications are based on notifications via email, and the protocol used is the SMTP protocol.
Setting Event Search duration
The users can set a time period to see events that occurred during that time period.
Custom allows users to set the time period they want to search for, and in addition to the current time period, users can choose from 1 day, 1 week, 2 weeks, 1 month, 3 months, 6 months, and 1 year ago.
Filtering area
The users can search for events that have occurred by filtering by specific Instance and Event Status.
The left side shows the items used for filtering, which can be removed from filtering via the x button to the right of each filter tag or reset with the Filtering Reset button. These items can be specified via the filter button on the right.
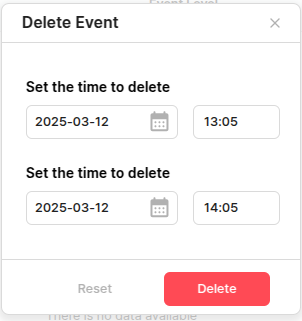
Setting Event Delete interval
The users can control the history of an event by deleting it by setting the interval in which the users want to delete it.
Event Table
This is a table where the users can see a list of events with both the Event Search period and filtering applied.
Stream Name
The name of the Stream that the Instance in which the event occurred belongs to.
Instance Name
The name of the Instance in which the event occurred.
Occurence Time
The time at which the event occurred.
Event Level
The Status of the event.
Message
The message about the event.
Affector
The entity that caused the event, such as Admin, Web, or Scheduler.
Event Filtering
The users can utilize these filters when searching the Event table for more sophisticated searches.

Replication Diagram area
The users can see a list of Streams - Instances that belong to the Diagram specified in the Diagram Filter in the header of the page.
Select the Instances the users want to select/clear by the filtering criteria. Select Stream if the users want to select/clear all instances in a Stream, or Diagram if the users want to select/clear all instances in the current Diagram.
Event Status area
All of the status types available on the Events page.
The Label, which is resolved to a level such as 'All', is the parent status for common grouping of statuses, and the Intended Status is the status that is actually checked and used.
Running
Instance is synchronizing normally.
Issue Log
Status that [E]/[F] logs are generated in the proxy. If this status occurs, the users can check the detailed logs through the Issue Log modal with the +more button in the Message item.
Delayed
The synchronization is delayed, and the delay criteria is the Diff set specified by the user in each Instance.
Network Unstable
The connection between the ProSync and the ProSync Manager is unstable.
Long Tx Start
The time when a transaction comes in and the ProSync creates a Part File. If this condition occurs, the users can check the detailed log through the Long Tx modal with the +more button in the Message item.
Appended
Additional Long Transaction information has been appended to the created Part File.
Rollbakced
A problem occurred during the reflection of a Long Transaction and it was rolled back.
Skipped
A Transaction with a value before the Last Committed TSN was received and skipped.
Replay
Long Transaction has been transferred to the replay thread and is being reflected.
End
Long Transaction has ended.
Stopped
Processes in the ProSync are stopped.
DB Disconnected
The connection between each SRC and TAR DB in the ProSync Manager is disconnected.
Agent Down
The Agent process in the ProSync is down.
Paused
The Ext process in the ProSync is paused.
Event Delete
The users can set the time period for which the users want to delete event history.
Email Notification Setting
ProSync Manager requires the users to set up the settings for SMTP in the UI and then send emails through that server.
The users should contact the mail server administrator for SMTP configuration details, as they may vary depending on the environment in which ProSync Manager is running. In particular, if the users want to send mail via SSL/TLS protocol, the server must be able to communicate in both directions.
1. Set SMTP
Before setting up Email Notification, the users need to set up the SMTP protocol.
2. Set Email Notification
Set and delete event alarms via email.
3. Email Notification table
Setting Name
The name that identifies the Email Alarm.
Target instance
The number of Instances that are set to receive event alarms.
DB Disconnected Agent Down Process Down Nework Unstable Delayed Issue Log
The time, in minutes, that the users set for each state to receive an email alert.
Notification
Enable/disable button for the created alarm.
Note
If the users have a Mail Transfer Agent (MTA) running on port 25 on their local host (e.g., postFix), the users can send mail without authentication by entering the IP/PORT of the agent.
However, this may end up in the recipient's spam folder, so the users'll need to change this in the recipient's mail account settings.
4-1. Set SMTP
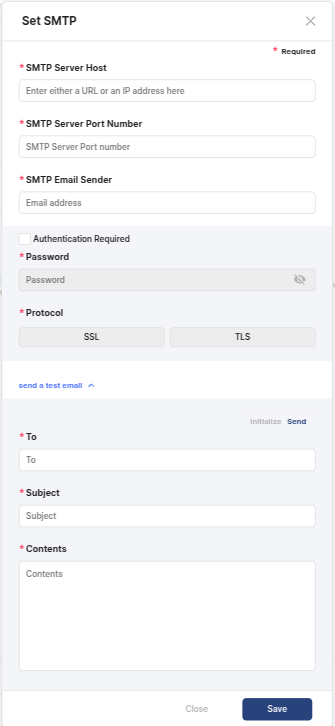
SMTP Server Host
Enter the HOST address of the server on which the users are setting up SMTP. (Required)
SMTP Server Port Number
Enter the port number of the SMTP server. (Required)
SMTP Email Sender
Enter the email address of the sender. The name of the actual email sender is displayed as ProsyncManager. (Required)
Athenticatation Required
This is the part where the users can enter the authentication related to SMTP Email. If authentication is required, check the appropriate item and enter it.
- Password: The password of the SMTP account to be set up.
- Protocol: Select the protocol to be used for secure communication.
[Caution]
Since this is an account used for SMTP servers that require authentication, mail will not be sent if an account that does not actually exist is used.
Send a Test Email
Available to send a test email to check if the account you want to send SMTP from is set up properly.
- To: Enter the email address of the person to receive the test email. (Required)
- Subject: Enter the subject of the test email. (Required)
- Contents: Enter a brief description of the test email. (Required)
- Initialize/Send: Click the Initialize/Send button to initialize or send the entered test email value.
4-2. Set Email Notification
A. Enter Basic Info
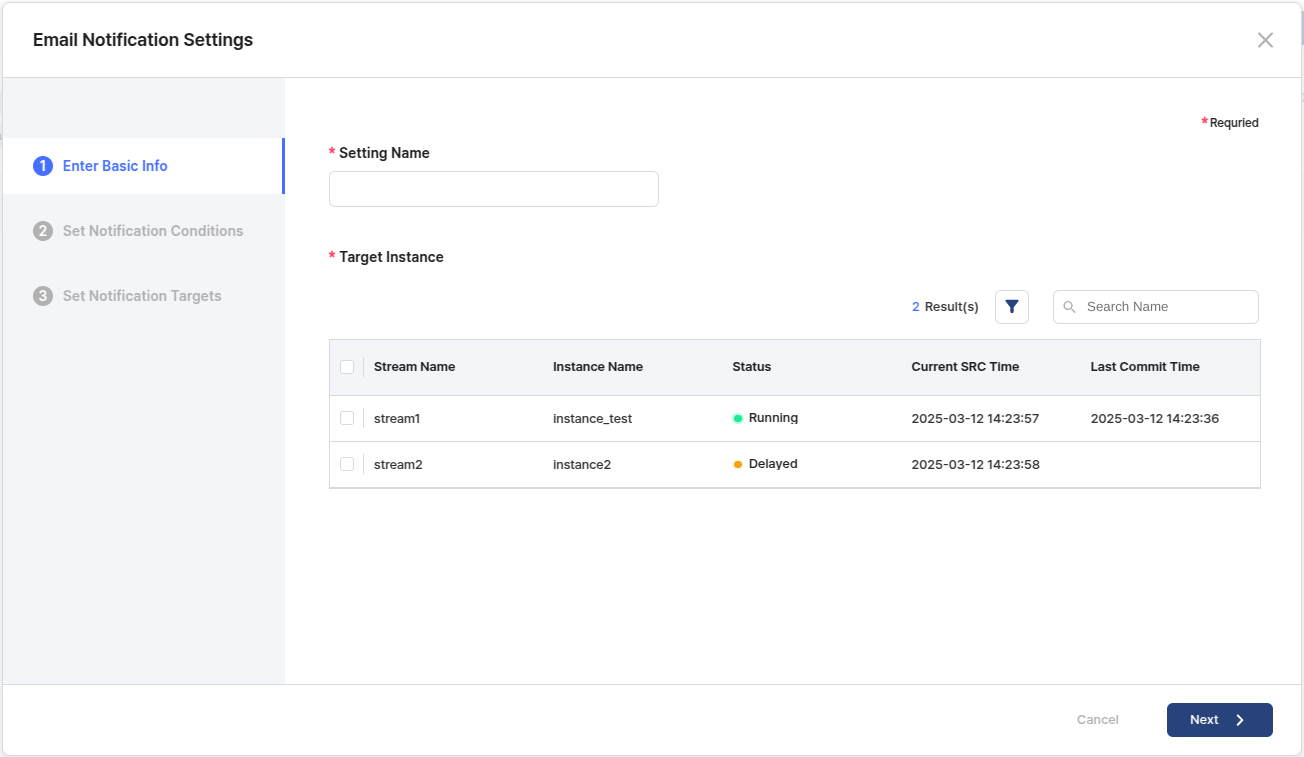
Setting Name
Teh name to identify the email alarm.
Y
Target Instance
Select the target instance to track events through the email alarm.
Y
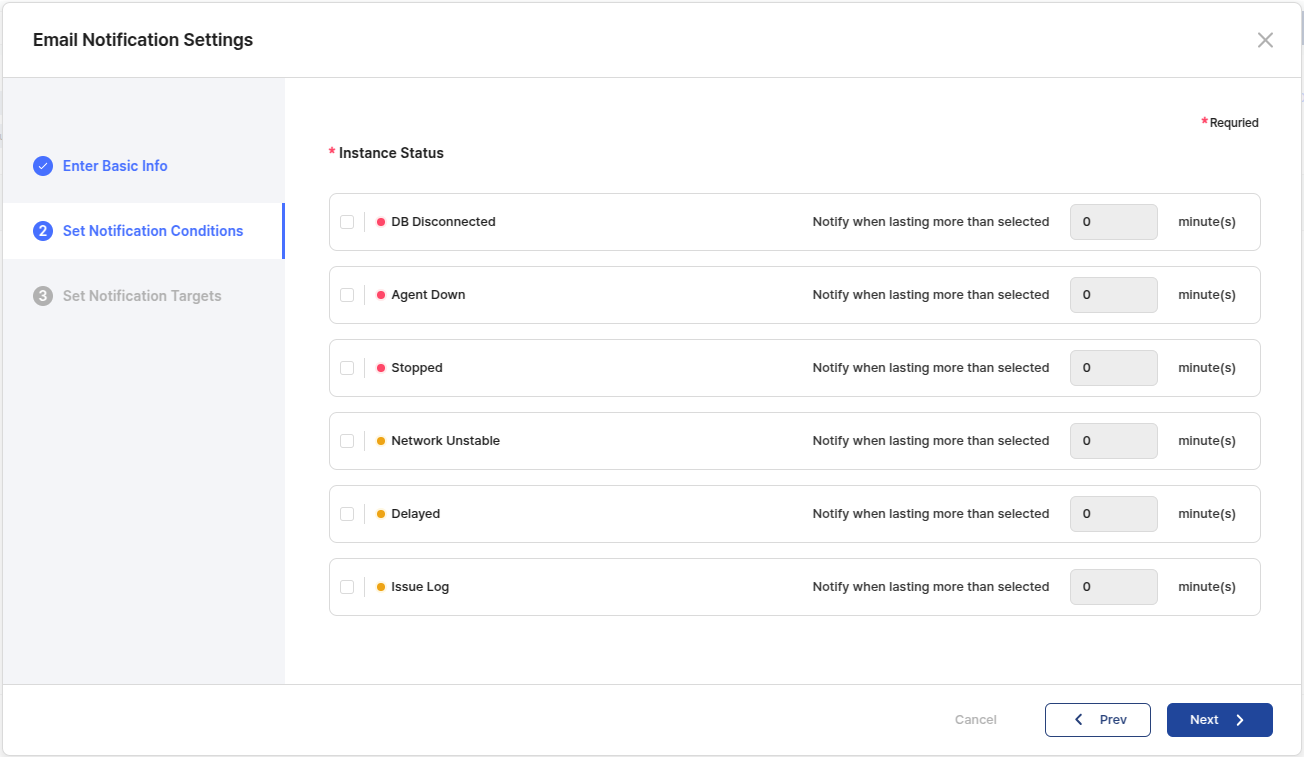
B. Set Notification Conditions
Set the status the users want to track with Email Alarm and the duration of the status.
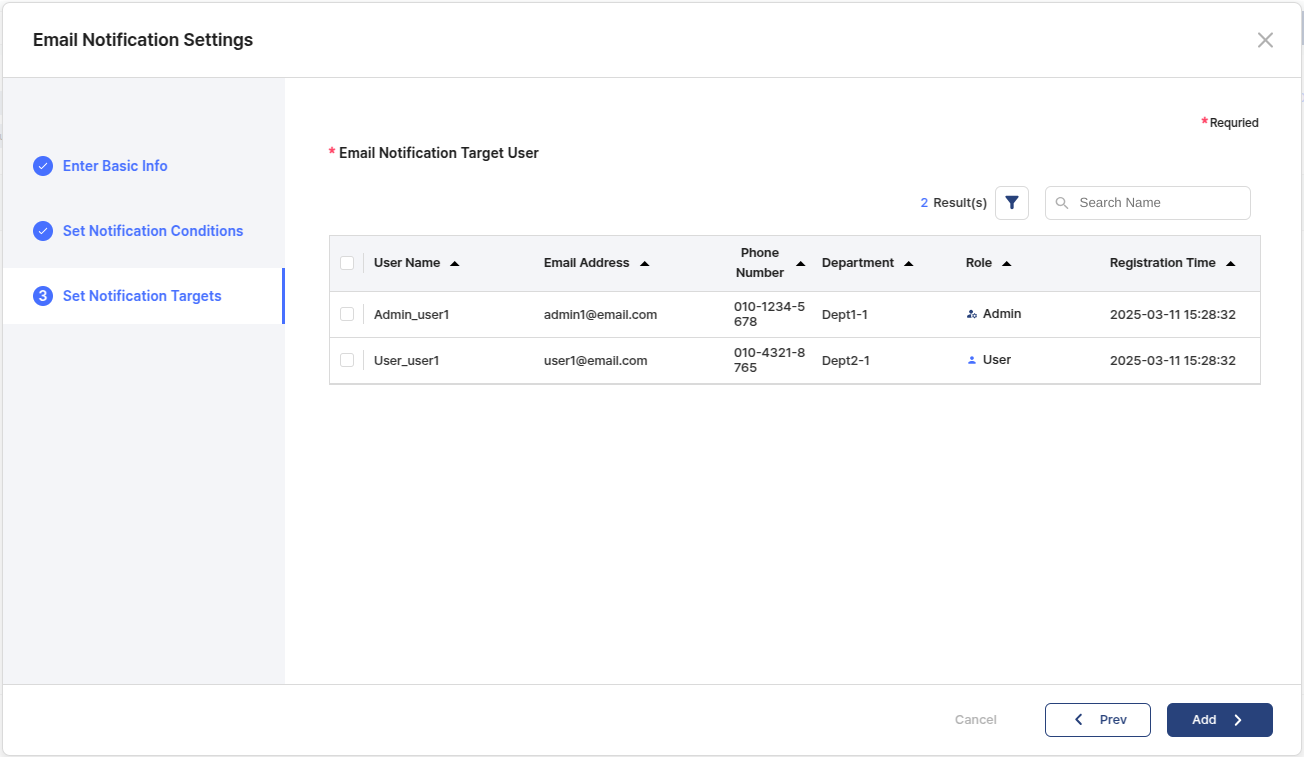
C. Set Notification Targets
Set the users the users want to receive this email alert.
Last updated